 By 管理员

First, a quick look at the base setup: a Tencent Cloud lightweight server running the Ubuntu Server 24.04 image, Baota installed by hand, WordPress hosting this site, the domain has completed ICP filing, and a Let’s Encrypt certificate applied for this domain to encrypt ssl. The Tailscale client is already installed on the server as well.
For an intro to the Tailscale derp service and how to install it, check the links at the end of this post — I won’t repeat all that here. This post is mainly about the configuration: dealing with the port conflict between Baota and the derp service, how to use the Let’s Encrypt certificate, how to write the systemd unit, how to set the derp service to start on boot, and the settings on the tailscale admin console.
The derp service uses https port 433 by default (likely a typo for 443), and on this server that port is already taken by the WordPress site, so we need to change the default port — using 2333 as the replacement here.
The official docs say you need udp port 3478 and tcp port 443, so we open both ports in the Tencent Cloud console and in Baota’s security settings, and watch which protocol we pick. If we need other services, say Windows remote control, we can open the matching port (3389) for it, but it’s better to change that port so it doesn’t get scanned — not going into that here.

After ssh into the server, permission issues mean the derp service can’t directly use the certificate Baota applied for, so I copy the certificate out and use it that way. The certificate path may differ between Baota versions, so adapt to it. I also tested it myself: no need to convert the certificate format, just rename the files.
Copy the certificate and key files to the derp path you want to use;
sudo cp /www/server/panel/vhost/cert/域名/fullchain.pem ~/derper路径/域名.crtsudo cp /www/server/panel/vhost/cert/域名/privkey.pem ~/derper路径/域名.keyChange the owner of the certificate and key files (Ubuntu as the example)
sudo chown ubuntu:ubuntu ~/derper路径/域名.crtsudo chown ubuntu:ubuntu ~/derper路径/域名.keyRun the derp service by hand to test it
sudo ~/go/bin/derper -hostname 域名 -c=derper路径/derper.conf -http-port=-1 -a :2333 -stun -certmode manual -certdir ~/derper路径/ -verify-clients-a :2333 specifies the custom port 2333
-http-port=-1 turns off http, only https access is allowed
-certmode manual -certdir ~/derper-path/ manual certificate mode, pointing at the path of the certificate and key
-verify-clients lets only authorized clients use the derp server. Very important, otherwise everyone can use the derp service on your server, and it only takes effect once you install the tailscale client on your own server and log in to verify
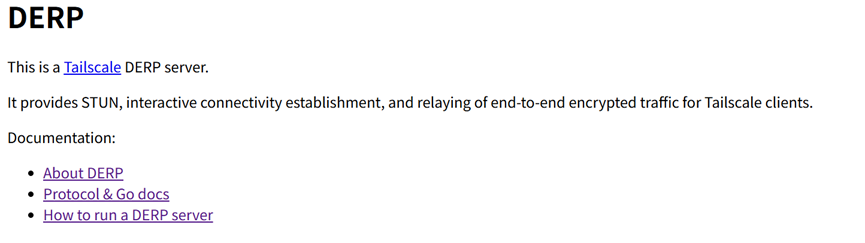
If it works, visiting https://your-domain:2333/ shows the derp server status page.
Now head over to the Access controls config on the tailscale admin console and set it up to use your own custom server
"derpMap": {
// "OmitDefaultRegions": true,

              "OmitDefaultRegions": false,

              "Regions": {"900": {

                     "RegionID":   900,

                     "RegionCode": "tencent derper",

                     "Nodes": [{

                            "Name":     "1",

                            "RegionID": 900,

                            "HostName": "域名",

                            "DERPPort": 2333,

                            "IPv4":     "服务器v4地址",

                            "IPv6":     "服务器v6地址”,

                     }],

              }},

       },
Set OmitDefaultRegions to true and you don’t use Tailscale’s official servers, only your own server’s derp — pick whichever suits you;
RegionID just needs to avoid conflicting with the official server IDs;
DERPPort is set to the port you’re using to replace https 443.
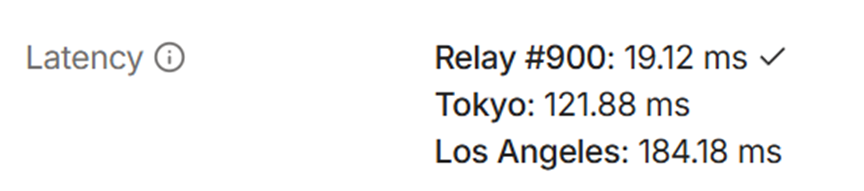
Once it’s applied, log back into a Tailscale client and, if the config is right, you’ll see Relay #900 in Machine Details on the admin console. Since the server is in China, the latency is way lower than with the official servers. If OmitDefaultRegions is set to true, the picture below shows just the one 900 server.
Next we create the systemd file for the derp service, so the service starts on its own when the machine boots.
Create the file and fill in the content
sudo vim/etc/systemd/system/derper.service[Unit]
Description=DERP Relay Server
After=network.target
[Service]
Type=simple
User=ubuntu
ExecStart=/home/ubuntu/go/bin/derper \
-hostname 域名\
-c=/home/ubuntu/derper路径/derper.conf \
-http-port=-1 \
-a :2333 \
-stun \
-certmode manual \
-certdir /home/ubuntu/derper路径/ \
-verify-clients
Restart=on-failure
RestartSec=5
[Install]
WantedBy=multi-user.targetIf you used the ~/ path, switch to the full path /home/ubuntu/, because systemd doesn’t expand ~
Reload
sudo systemctl daemon-reexecsudo systemctl daemon-reloadMake sure the service starts on its own at boot
sudo systemctl enable derperStart the service
sudo systemctl start derperCheck the service status
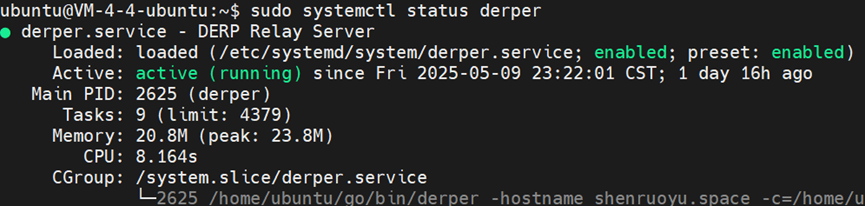
sudo systemctl status derperIf the config is fine, you should see something like:
View the logs
journalctl -u derperIf you need to stop or restart the derper service, run these commands:
sudo systemctl stop derpersudo systemctl restart derperAfter that, reboot the server by hand and check that the derp service starts on its own — that finishes the setup.
Reference links
https://tailscale.com/kb/1082/firewall-ports
https://zhuanlan.zhihu.com/p/638910565
https://bbs.xcjc.net/viewthread.php?tid=9232
Published on May 11, 2025.